Claw Cloud Deployment
Deploy GPT-Load to Claw Cloud for free. No server required, one-click deployment for quick experience.
⚠️ Important Notice: Please Back Up Your Data!
Claw Cloud is an experimental free service with no stability guarantee. The following risks exist:
- Service may become unstable or temporarily unavailable
- Data may be lost due to service failures
- Free service has no SLA guarantee
- Instances may be restarted or reassigned
🔄 Strong Recommendations:
- Regularly export and backup your configuration data
- Save all important API keys and configuration information
- Consider stable paid cloud services for production environments
- Use Claw Cloud only for testing and learning purposes
Service Overview
Claw Cloud Free Deployment
Lightweight cloud deployment solution using SQLite database and memory storage, with completely free $5 monthly quota
Free Quota
$5 free usage quota per month
Global Deployment
Support multiple region deployment to optimize access speed
Simple Authentication
Only requires GitHub account to get started
Prerequisites
Account Requirements
Requires a GitHub account with more than 6 months of history to use Claw Cloud service
Service Features
Free Quota
- • $5 free usage quota per month
- • Suitable for personal users and small-scale testing
- • No credit card verification required
- • Option to pay for continued use after exceeding quota
Technical Specifications
- • Uses SQLite database
- • Memory storage (no Redis)
- • Automatic backup and recovery
- • Built-in monitoring and logging
Deployment Steps
Register and Login
Login to Claw Cloud with GitHub
Visit the Claw Cloud website and click 'Get started for free', then login with your GitHub account.
Select Deployment Region
After login, select an appropriate deployment region in the top-left corner:
- • Singapore - Singapore
- • Japan - Japan
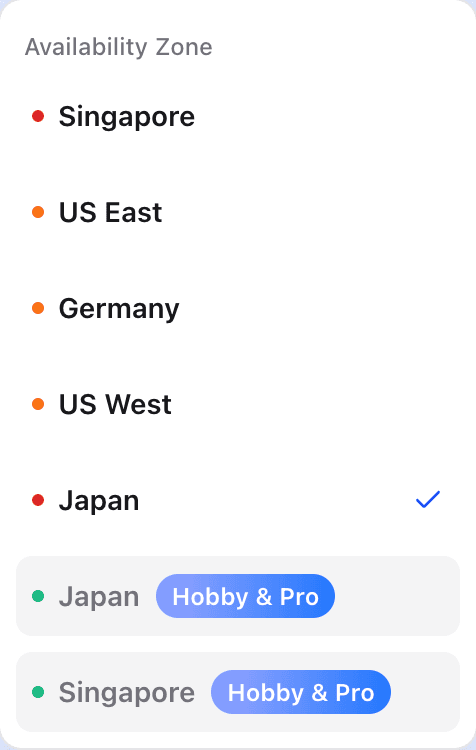
Click image to enlarge
Claw Cloud region selection interface
Create Application
Launch Application Creation
Click "App Launchpad" in the center, then click "Create App" in the top-right corner to start creating the application
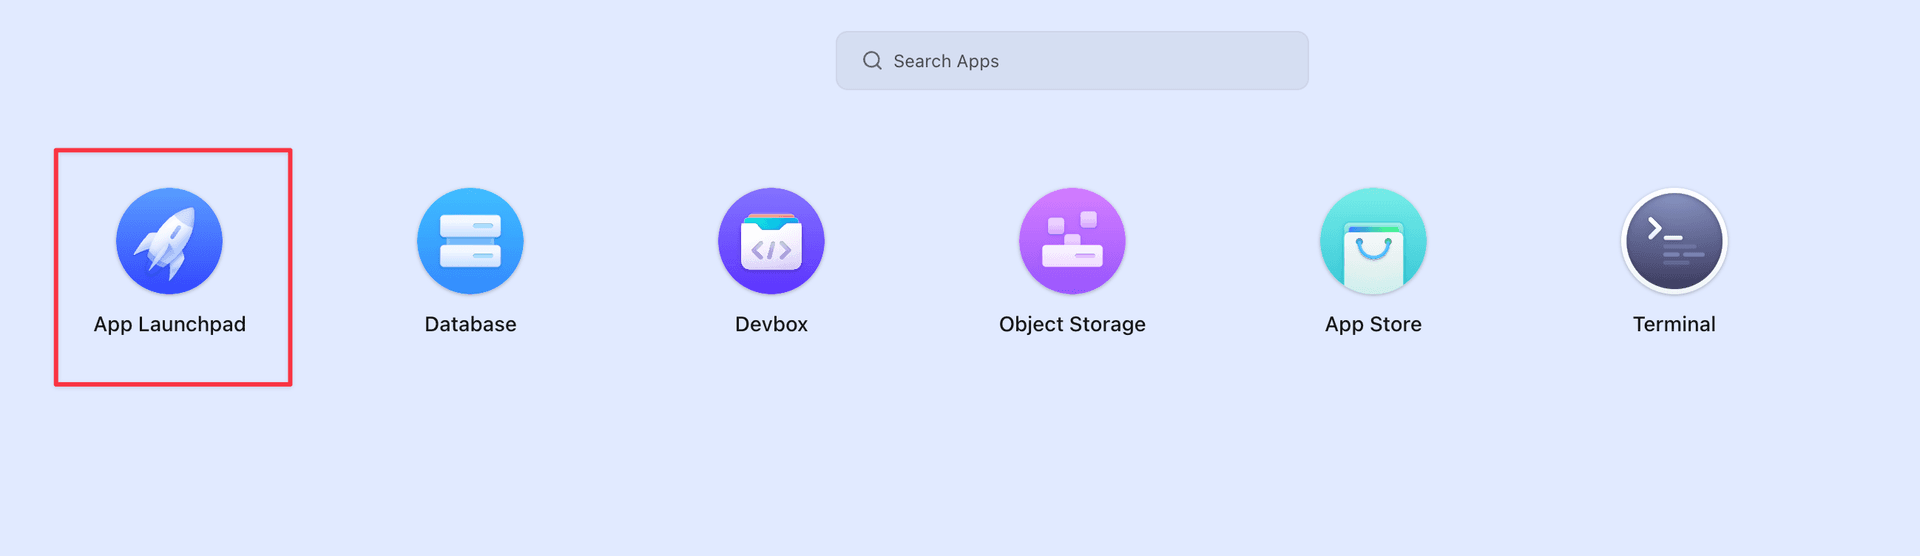
Click image to enlarge
App Launchpad - Create Application
Configure Application
Fill Application Configuration Form
Basic (Basic Information)
gpt-loadghcr.io/tbphp/gpt-load:latestUsage (Resource Configuration)
Resource Configuration Recommendations
Based on the $5 quota calculation, recommended configuration is CPU: 1, Memory: 512M. For personal use with low network traffic, you can reduce configuration to save costs.
Network (Network Configuration)
3001Environment Variables (Environment Variables)
Click "Environment Variables" to add the following configuration:
AUTH_KEY=sk-your-custom-key⚠️ Please replace sk-your-custom-key with your own password, do not use default values or share publicly
Local Storage (Storage Configuration)
/app/dataAfter configuration, click "Confirm" to save storage configuration
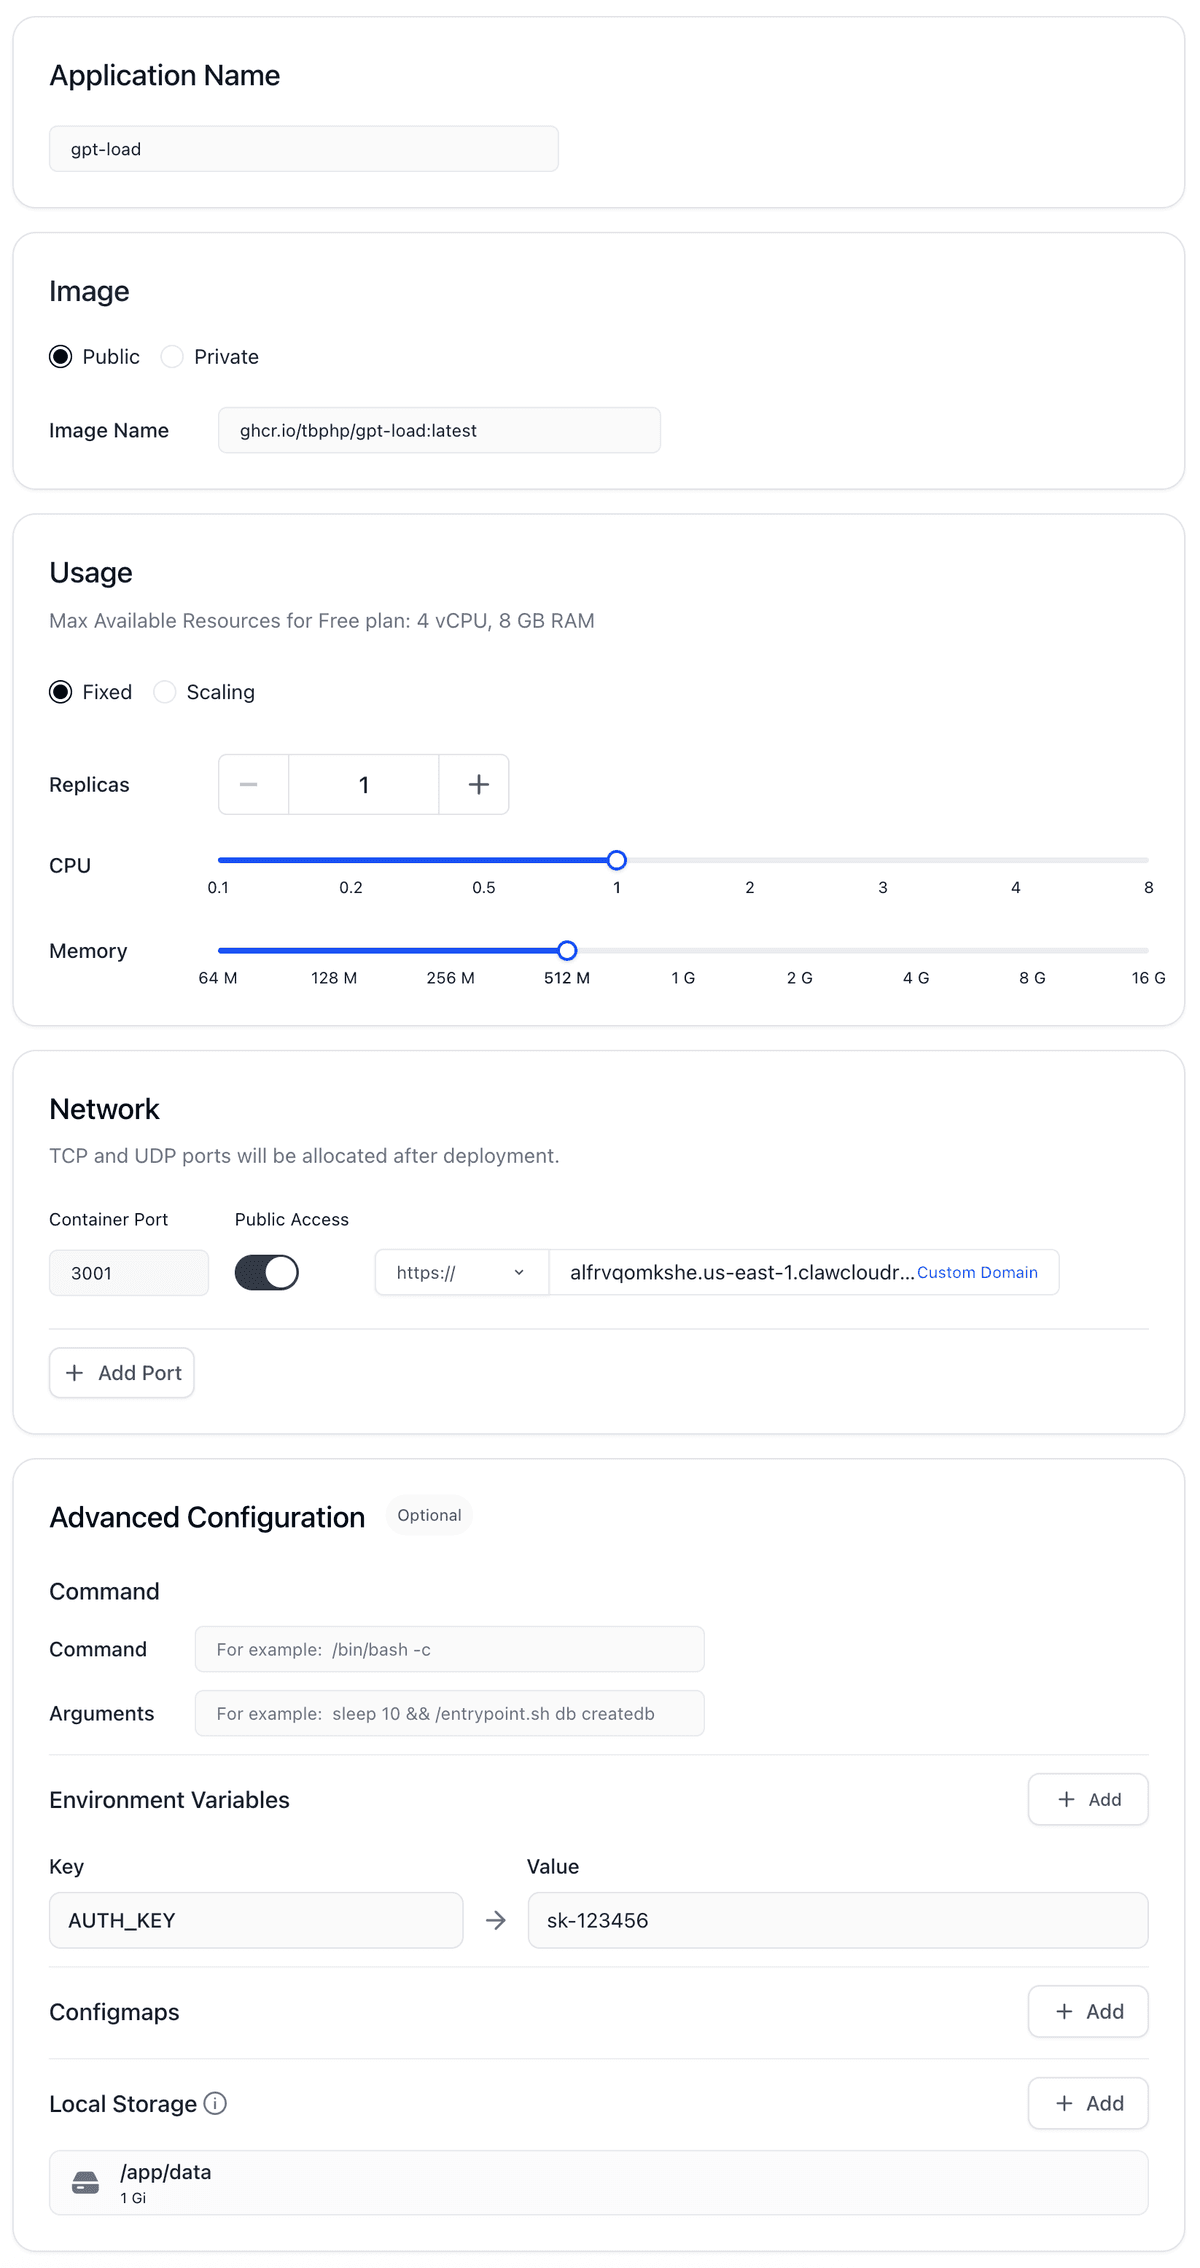
Click image to enlarge
Application configuration form
Deploy Application
Start Deployment
After configuration is complete, click the "Deploy Application" button in the top-right corner to start deploying the application
Deployment Complete
The entire creation process is very simple and convenient! After deployment is complete, wait for the public address to take effect, which may take a few minutes.
Wait for Service to Start
Patiently wait for the "Public Address" status to turn green "Available", then you can access your GPT-Load service
Access and Usage
First Access
Get Access Address
After deployment is complete, you can see your application's public address in the Claw Cloud console
https://ax***fta.region.clawcloudrun.comLogin to Management Interface
Visit your application address and use the configured AUTH_KEY to login to the management interface
Security Tip
Please ensure your AUTH_KEY is secure and do not share it in public places or documents
API Usage
API Proxy Address
https://ax***fta.region.clawcloudrun.com/proxy/{group_name}Usage Example
curl -X POST https://ax***fta.region.clawcloudrun.com/proxy/openai/v1/chat/completions \
  -H "Authorization: Bearer your-auth-key" \
  -H "Content-Type: application/json" \
  -d '{"model": "gpt-4o-mini", "messages": [{"role": "user", "content": "Hello"}]}'
Updates and Maintenance
Version Updates
Update Steps
Enter App Launchpad and select your created application
Click the "Update" button in the top-right corner
On the update page, no need to modify any configuration, directly click the "Update" button
Wait for update and restart to complete
Automatic Updates
The update process will automatically pull the latest version of the image, no manual configuration required
Monitoring and Logs
Application Monitoring
- • View application status in Claw Cloud console
- • Monitor resource usage and costs
- • View application runtime logs
- • Set alerts and notifications
Cost Control
- • Regularly check monthly usage and costs
- • Adjust resource configuration based on actual usage
- • Set budget and cost alerts
- • Consider pausing service during low-traffic periods
Troubleshooting
Common Issues
Application Failed to Start
Possible causes: Image pull failure, configuration errors, or insufficient resources
Solution: Check application logs, confirm image address and configuration are correct
Cannot Access Public Address
Possible causes: DNS propagation delay or network issues
Solution: Wait a few minutes and retry, check network connection
Authentication Failed
Possible causes: AUTH_KEY configuration error or not set
Solution: Check environment variable configuration, ensure AUTH_KEY is correct
Next Steps
After Claw Cloud deployment is complete, you can:
- Configure AI services through the Web management interface
- Add API keys to start using proxy services
- Monitor usage and costs
- Upgrade to higher configurations as needed